Proxy SwitchyOmega is a popular proxy management extension for Chrome and Firefox. It allows you to easily switch between different proxy servers and configurations, making it a great tool for users who need to manage proxies for browsing, testing, or privacy purposes.
Here’s a step-by-step guide on how to set up and use Proxy SwitchyOmega in both Google Chrome and Mozilla Firefox.
Step 1: Install Proxy SwitchyOmega
For Google Chrome:
- Open Chrome and visit the Chrome Web Store:
Proxy SwitchyOmega - Chrome Web Store
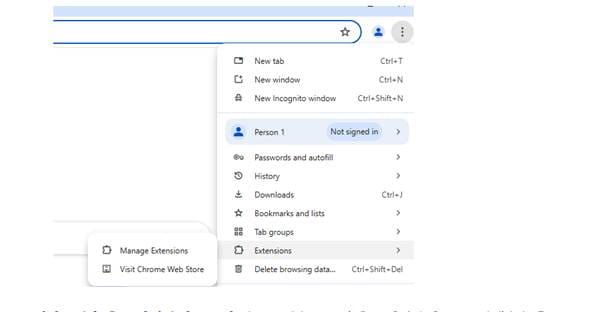
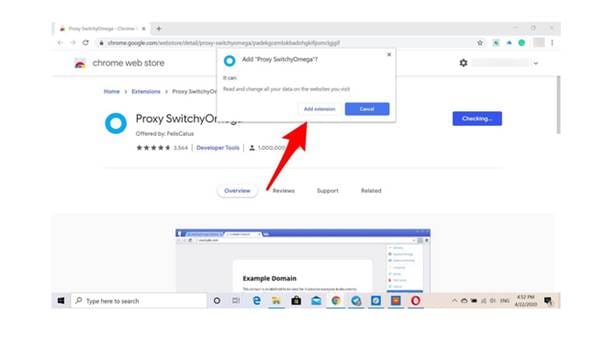
- Click Add to Chrome to install the extension.
- After installation, you’ll see the SwitchyOmega icon (a small globe) in the upper-right corner of your Chrome browser.
For Mozilla Firefox:
- Open Firefox and visit the Firefox Add-ons Store:
Proxy SwitchyOmega - Firefox Add-ons - Click Add to Firefox and then click Add to confirm.

- After installation, you’ll see the SwitchyOmega icon in the upper-right corner of Firefox.

Step 2: Set Up Proxy Profiles
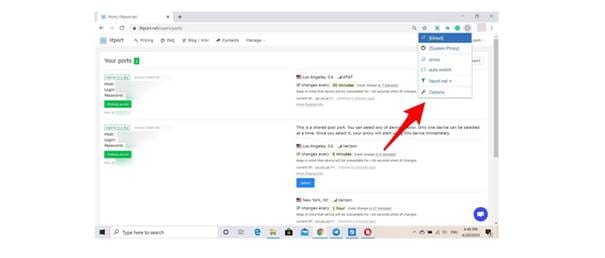
- Click the Proxy SwitchyOmega icon in your browser’s toolbar to open the extension.
- Choose Options or Settings from the drop-down menu to open the settings page.
- On the settings page, you can create different proxy profiles for various proxy configurations (e.g., HTTP, SOCKS5, or automatic proxy settings).
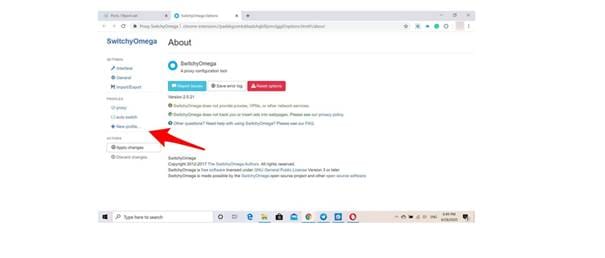
- Create a Profile:
- Click on New Profile or Create New Profile.
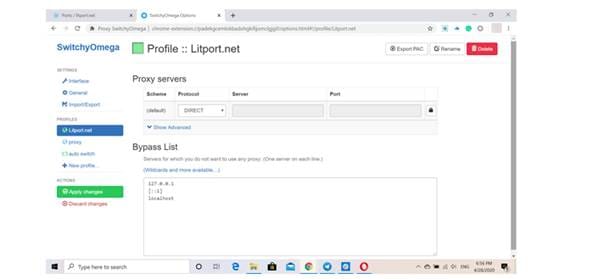
- Name the profile (e.g., “Work Proxy” or “Home Proxy”).
- Select the type of proxy you want to use (HTTP, HTTPS, SOCKS5, etc.).
- Enter Proxy Details:
- Proxy Server: Enter the IP address or domain name of the proxy server.
- Port: Enter the port number (typically provided by the proxy service).
- Authentication (optional): If your proxy requires authentication, enter the username and password.
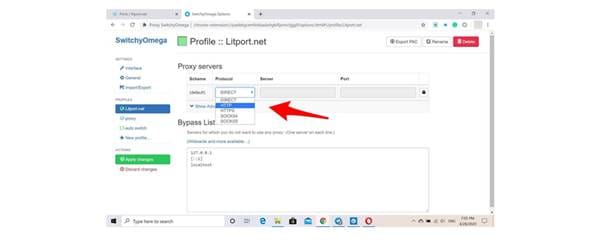
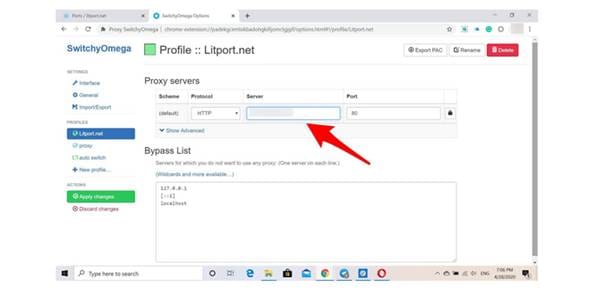
- After filling in the necessary information, save the profile.
Step 3: Switch Between Proxy Profiles
- Once you’ve created your proxy profiles, click the SwitchyOmega icon in the browser toolbar.
- You’ll see a drop-down list with the proxy profiles you created.
- Select the profile you want to use, and SwitchyOmega will automatically switch to that proxy.
Step 4: Using Auto Switch Mode (Optional)
SwitchyOmega has an Auto Switch Mode that allows the browser to automatically use different proxies for different websites or conditions (for example, switching to a specific proxy for a particular domain).
- Go to the "Auto Switch" tab in the Proxy SwitchyOmega settings.
- Click Add Rule to create a new rule.
- Define the conditions (e.g., match a specific domain or URL pattern).
- Choose the proxy profile that should be used for that specific condition.
This is useful if you want to automatically route certain sites through a specific proxy while others use a different configuration.
Step 5: Disable Proxy or Set Default Proxy
- If you want to disable the proxy (i.e., go back to using your default connection), you can click the SwitchyOmega icon and choose "Direct" or "System Proxy" depending on your preference.
- Alternatively, you can set a default proxy for all traffic by configuring it in the Default Profile.
Step 6: Troubleshooting (if needed)
If you encounter any issues with Proxy SwitchyOmega, here are some troubleshooting tips:
- Check Proxy Details: Make sure the proxy server's IP and port are correct.
- Test Connection: Test your proxy connection using a website like to confirm that the proxy is working.
- Authentication: Double-check your proxy username and password if authentication is required.
Conclusion
Proxy SwitchyOmega is a powerful and user-friendly tool for managing proxies in Chrome and Firefox. By following the steps above, you can set up and switch between multiple proxy profiles with ease. Whether you need proxies for privacy, testing, or security, SwitchyOmega makes managing them a breeze.
